- Documentation
- User Manual
User Manual
The dashboard
After logging in, you access the dashboard - the central data management panel. It provides an overview of the available data and related actions. Depending on the user's permission, different data stocks and actions are available. The dashboard is empty after a fresh installation.

The dashboard
Create and edit data models
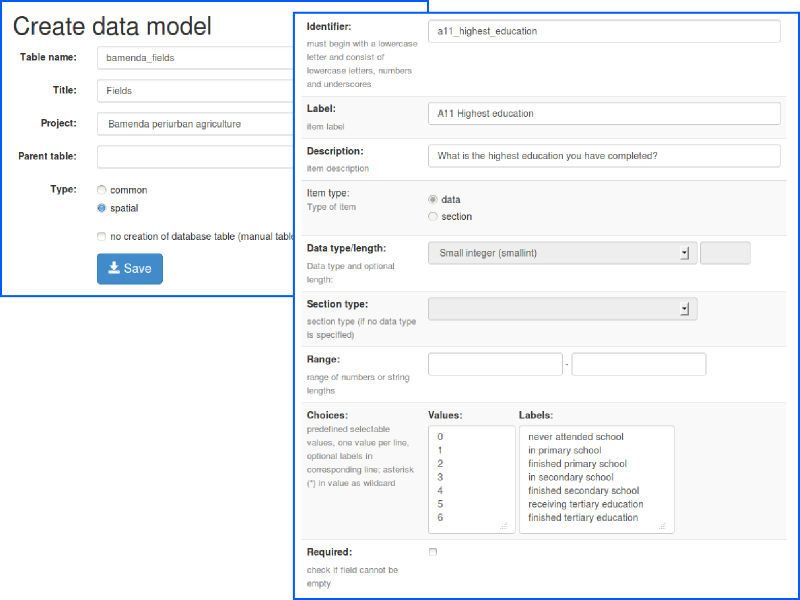
As user with appropriate permissions ("Administrator" or "Data Manager") you can create a new data model (button "Add data model"). A database table name, a title and the type of the data (common or spatial) needs to be specified. A corresponding database table is created when creating the data model. It contains columns that are required internally by the web application (e.g. columns for primary and foreign key or a geometry column for spatial data). After creating the data model, further adjustments can be made (tab "Properties") and data model elements can be added (tab "Structure"). Data model elements contain the definition of the attributes (data type, data range, etc.). When adding a data model element, a corresponding database table column is created.

Properties of a data model element
Data overview
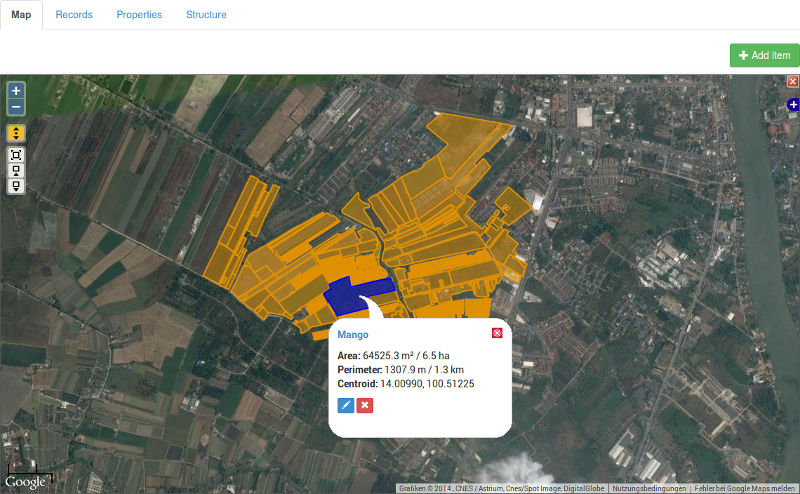
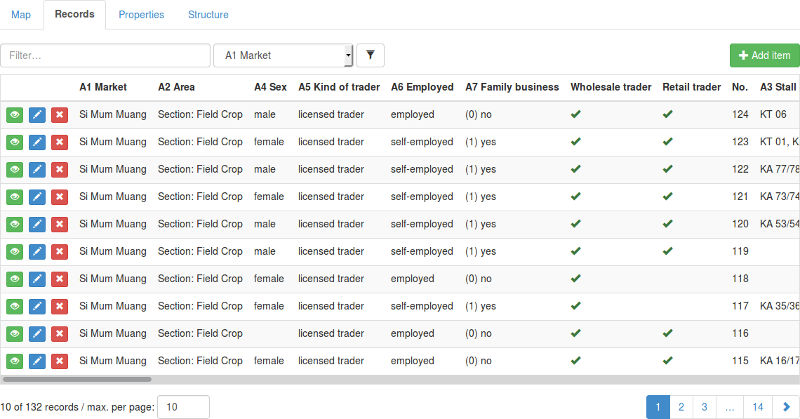
By clicking a data model in the dashboard you access the data overview page of a data stock. In case of spatial data, the geometries are displayed on a map and the attributes are accessible by clicking on the tab "Records". For non-spatial data, the map is not available and the attribute table appears directly. By clicking on a geometry a text bubble with basic information and options (edit and delete record) appears. These options are also accessible in the attribute table. By clicking on the record label (or the eye symbol in the attribute table) the record details are shown.

Data overview of a spatial data stock

Attribute table
Create and edit data records
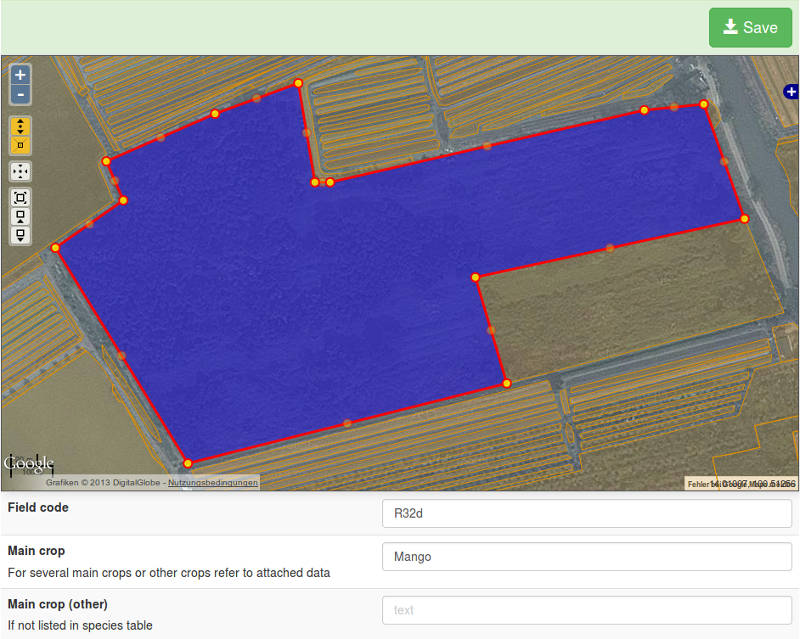
If you have write permissions on a data stock, there are options to add, edit and delete data records. Data records are added or edited by drawing its geometry (point, line or polygon) on a map (spatial data only) and filling out the attributes form (spatial and non-spatial data). If the type of geometry (point, line or polygon) is not defined in the data model, it can be set in the toolbar of the map. A point geometry is entered by just clicking on the desired location on the map. Lines and polygons are entered by clicking its vertices one after another. You can undo the last setting of a vertex with the key combination [Ctrl] + [Z]. By double clicking, the last vertex is set and the geometry is completed. If necessary, the geometry can be modified subsequently. For this purpose, the vertices (or the point itself if it's a point geometry) can be moved by drag and drop. Additional vertices are added by clicking on the highlighted "virtual vertices" (line and polygon geometries). To delete a vertex, hover on it and press [DEL].

Bearbeiten eines räumlichen Datensatzes
Data conversion and download
Data can be downloaded directly from the dashboard (download button in the column on the right) or in the data overview of a data stock (Options → Download data). Depending on the type of data (spatial or non-spatial), different options and formats are available.Create and download data sheets
Printable data collection sheets can be generated and downloaded. This option is available in the dashboard (button in the column on the right) or in the data overview of a data stock (Options → Download sheet).
User and group management
User groups can be created in order to assign different tasks and permissions to users. The user and group management is available under Administration → Users and Groups. If, for example, users need to have write access to a specific data stock, create a user group, add the permission "Data access", select the data stock and check "write". You can add any number of permissions to a group. Higher levels of permissions include lower ones (e.g. write access includes read access and the permission "data management" includes read and write access to all data stocks). After creating the group, you can add the the users to it. (tab "Users").
Basemap configuration
You can integrate basemaps via self hosted or external map servers (e.g. WMS or tile server) as well as basemaps provided by map services like Google Maps, Bing Maps or OpenStreetMap. The basemap configuration can be found under Administration → Base maps. The definition of a map source is done according to the OpenLayers class OpenLayers.Layer. A Google Maps satellite image map would, for example, be defined this way: Google("Google Satellite", {type:google.maps.MapTypeId.SATELLITE, numZoomLevels: 20}). Google Maps requires an external JavaScript library. You can specify the URL of this resource in the field "JavaScript (URL)": //maps.google.com/maps/api/js?v=3.2&sensor=false. The definition of a WMS server would look like this: WMS("WMS-Layer", "http://example.org/wms/", {layers: ’basic’} ).
Backup
The backup functionality is available under Administration → Backup. To use it, a database superuser name and password as well as the path to a backup directory (writable by the web server and not accessible via HTTP; path should end with "/", e.g. "/home/geocre/backup/") must be specified in the database settings file (config/db_settings.conf.php).
Pages
A simple content management system (CMS) allows to create pages and add photos. This option can be accessed under Administration → Pages.